
I’m so excited to share my barn door tutorial!!!! Full disclosure we had a pretty hard time hanging it up! Sooooooo, this tutorial will focus mostly on building the barn door rather than installing it. You can watch this video for more of an install tutorial.
MATERIALS
(2) 6ft 1x6 boards
(2) 8ft 1x4 boards
(4) 8 ft 1x2 boards
Small Clamps (I used like 10)
Behr Ultra white Paint & Primer (see step )
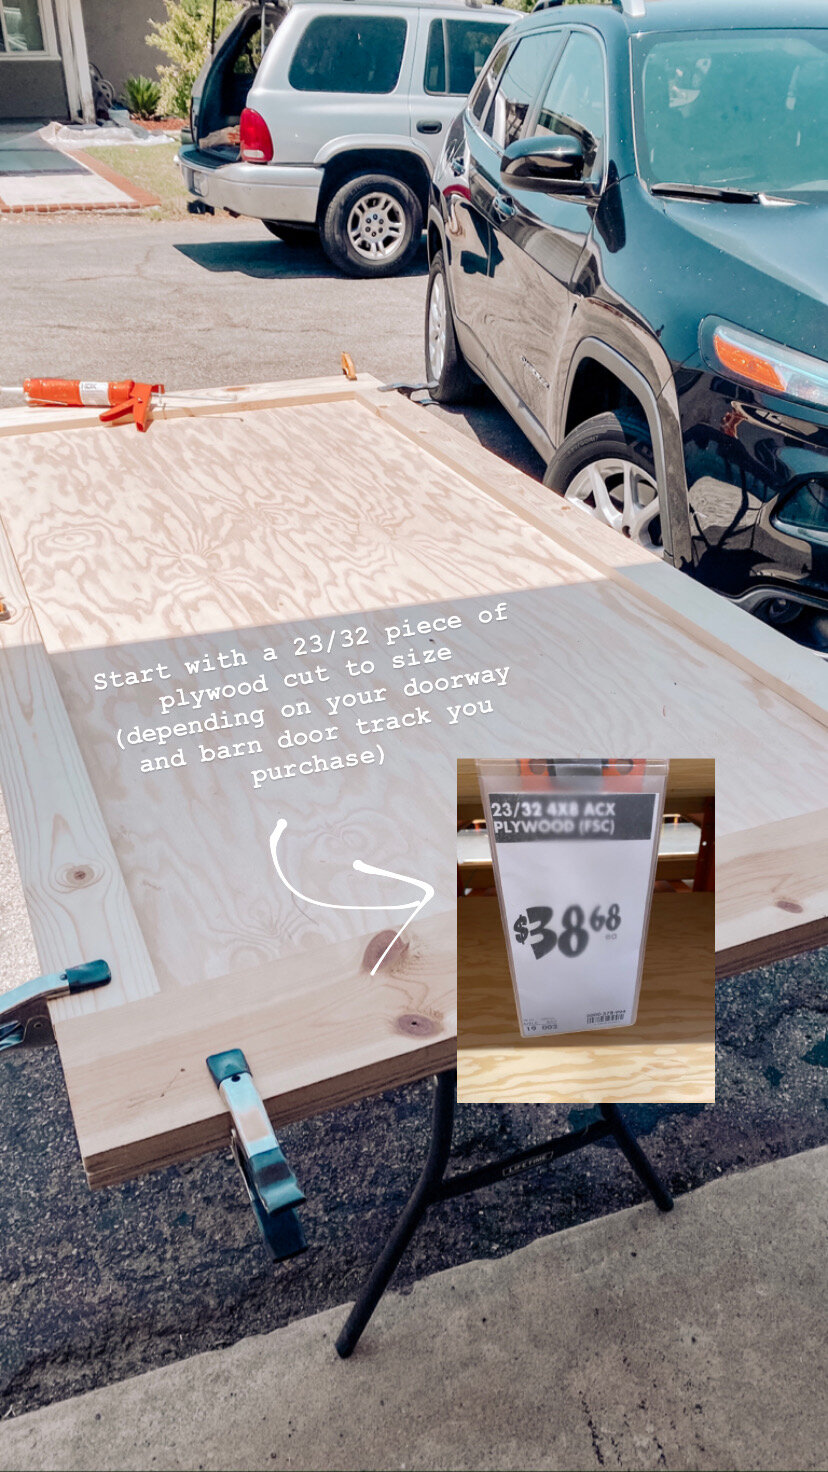
STEP 1
Purchase all the materials listed above! Start with your plywood and cut to size. Size will depend on your specific ceiling height and doorway. It is super helpful to read the instructions for the barn door track to determine sizing (it has to be a certain height from the floor etc.)
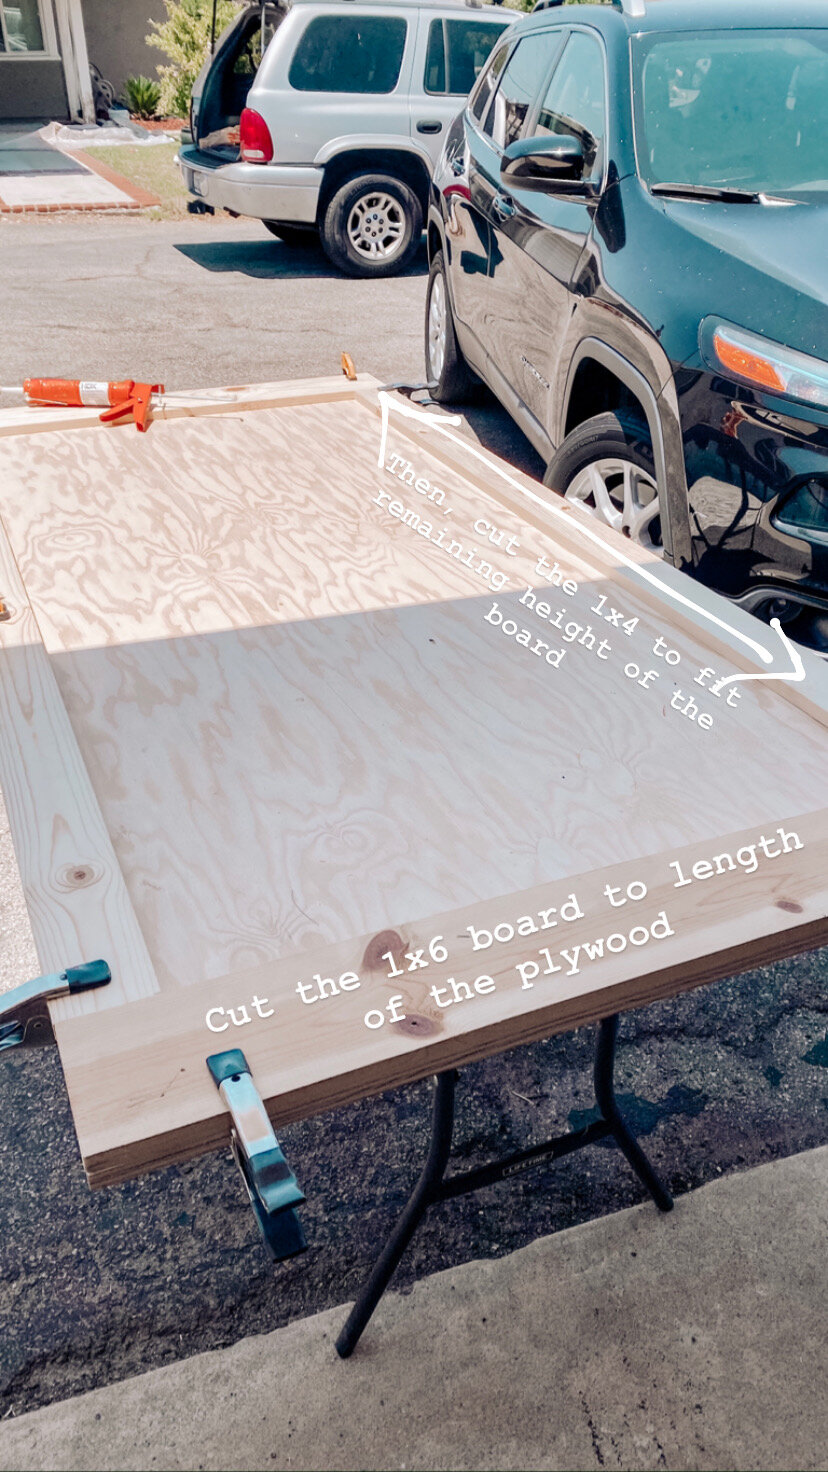
STEP 2
Cut the 1x6 board to match the width of the plywood. For example: If your door is 40 inches wide - cut the 1x6 board 40 inches. Then, cut the 1x4 board to fit remaining height. This will most likely be height of the plywood minus 11 inches. Glue with liquid nails and clamp!
STEP 3
Now onto the diagonal wood detailing in the middle of the board! This was the trickiest part for me to figure out! Start at the top left corner. cut the end of a 1x2 at a 45 degree angle using the miter saw. Stick it in the top left corner. Make sure it is nice and snug!

STEP 4
Mark a line on the other end of the 1x2 to match the side board using some kind of straight edge. Then use the miter saw to cut along the marked line. Glue & clamp!

STEP 5
Now repeat that process in the bottom right corner!

STEP 6
For the smaller diagonal pieces in the top right corner, measure the center width of the top of the board and mark! Cut the end of a 1x2 board at a 45 degree angle using the miter saw. Match up the center of the 1x2 end with the mark made earlier. Repeat process used earlier to trim the other end of the board (Mark a line on the other end of the 1x2 to match the side board using some kind of straight edge. Then use the miter saw to cut along the marked line. ) Glue & clamp!

STEP 7
Repeat this process in the bottom left corner

STEP 8
At this point you should have 4 diagonal pieces. For the center diagonal piece - measure the center of the height of the board and mark. Cut the end of a 1x2 board at a 45 degree angle using the miter saw. Match up the center of the 1x2 end with the mark made earlier. Repeat process used earlier to trim the other end of the board (Mark a line on the other end of the 1x2 to match the side board using some kind of straight edge. Then use the miter saw to cut along the marked line. ) Glue & clamp!

STEP 9
Use a nail gun to nail down all your wood. Don’t get too crazy. Just a nail or 2 at each end!

STEP 10
Now sand the rough edges!

STEP 11
Using Interior flat BEHR paint and primer-in-one, paint your board! I used ultra white. I used a roller for the big areas and a brush for the smaller areas such as the sides of the 1x2s and corners. Lesson learned: don’t skip the wood putty!) In hind sight I would have used wood putty to smooth out nail holes and grooves in wood for a smoother finish.

STEP 12
Pour yourself a drink! You are almost done!! In about 2 coats my board was looking freshhhhh.

STEP 13
Now onto the install…watch this video tutorial and good luck!