• HOME
  • SERVICES
    • Staging Portfolio
    • Interior Design
  • Blog
  • Contact
Menu

Staged by ana egger

Home Edits // Remodel Design // Staging
  • HOME
  • SERVICES
  • PORTFOLIO
    • Staging Portfolio
    • Interior Design
  • Blog
  • Contact
THESE FREE GIFT TAGS ADD SO MUCH TO MY HOLIDAY WRAPPING!

THESE FREE GIFT TAGS ADD SO MUCH TO MY HOLIDAY WRAPPING!

CHRISTMAS GIFT TAGS: FREE DOWNLOAD!

December 16, 2018

Wrapping is one of my favorite things this time of year. I love thinking of a new theme for under the tree. One thing I always struggle with is finding cute/affordable tags to go with the ribbons and wrapping. So this year, I teamed up with my twin sis Tatiana Soash to create these FREE downloadable tags! All you need is some cardstock, scissors, and a printer. Click below to download. Happy Wrapping!

CLICK HERE TO DOWNLOAD SET 1
CLICK HERE TO DOWNLOAD SET 2
LOVE THESE GIFT TAGS DESIGNED BY @TATIANASOASH

LOVE THESE GIFT TAGS DESIGNED BY @TATIANASOASH

CAN’T WAIT TO USE THESE GIFT TAGS FOR ALL MY PRESENTS THIS YEAR!

CAN’T WAIT TO USE THESE GIFT TAGS FOR ALL MY PRESENTS THIS YEAR!

These gift tags are gonna look so trendy under my tree!

These gift tags are gonna look so trendy under my tree!

In DIY PROJECTS Tags DIY, Wrapping, gift, holiday, christmas tag, holiday gift tag, gift tag download
Comment
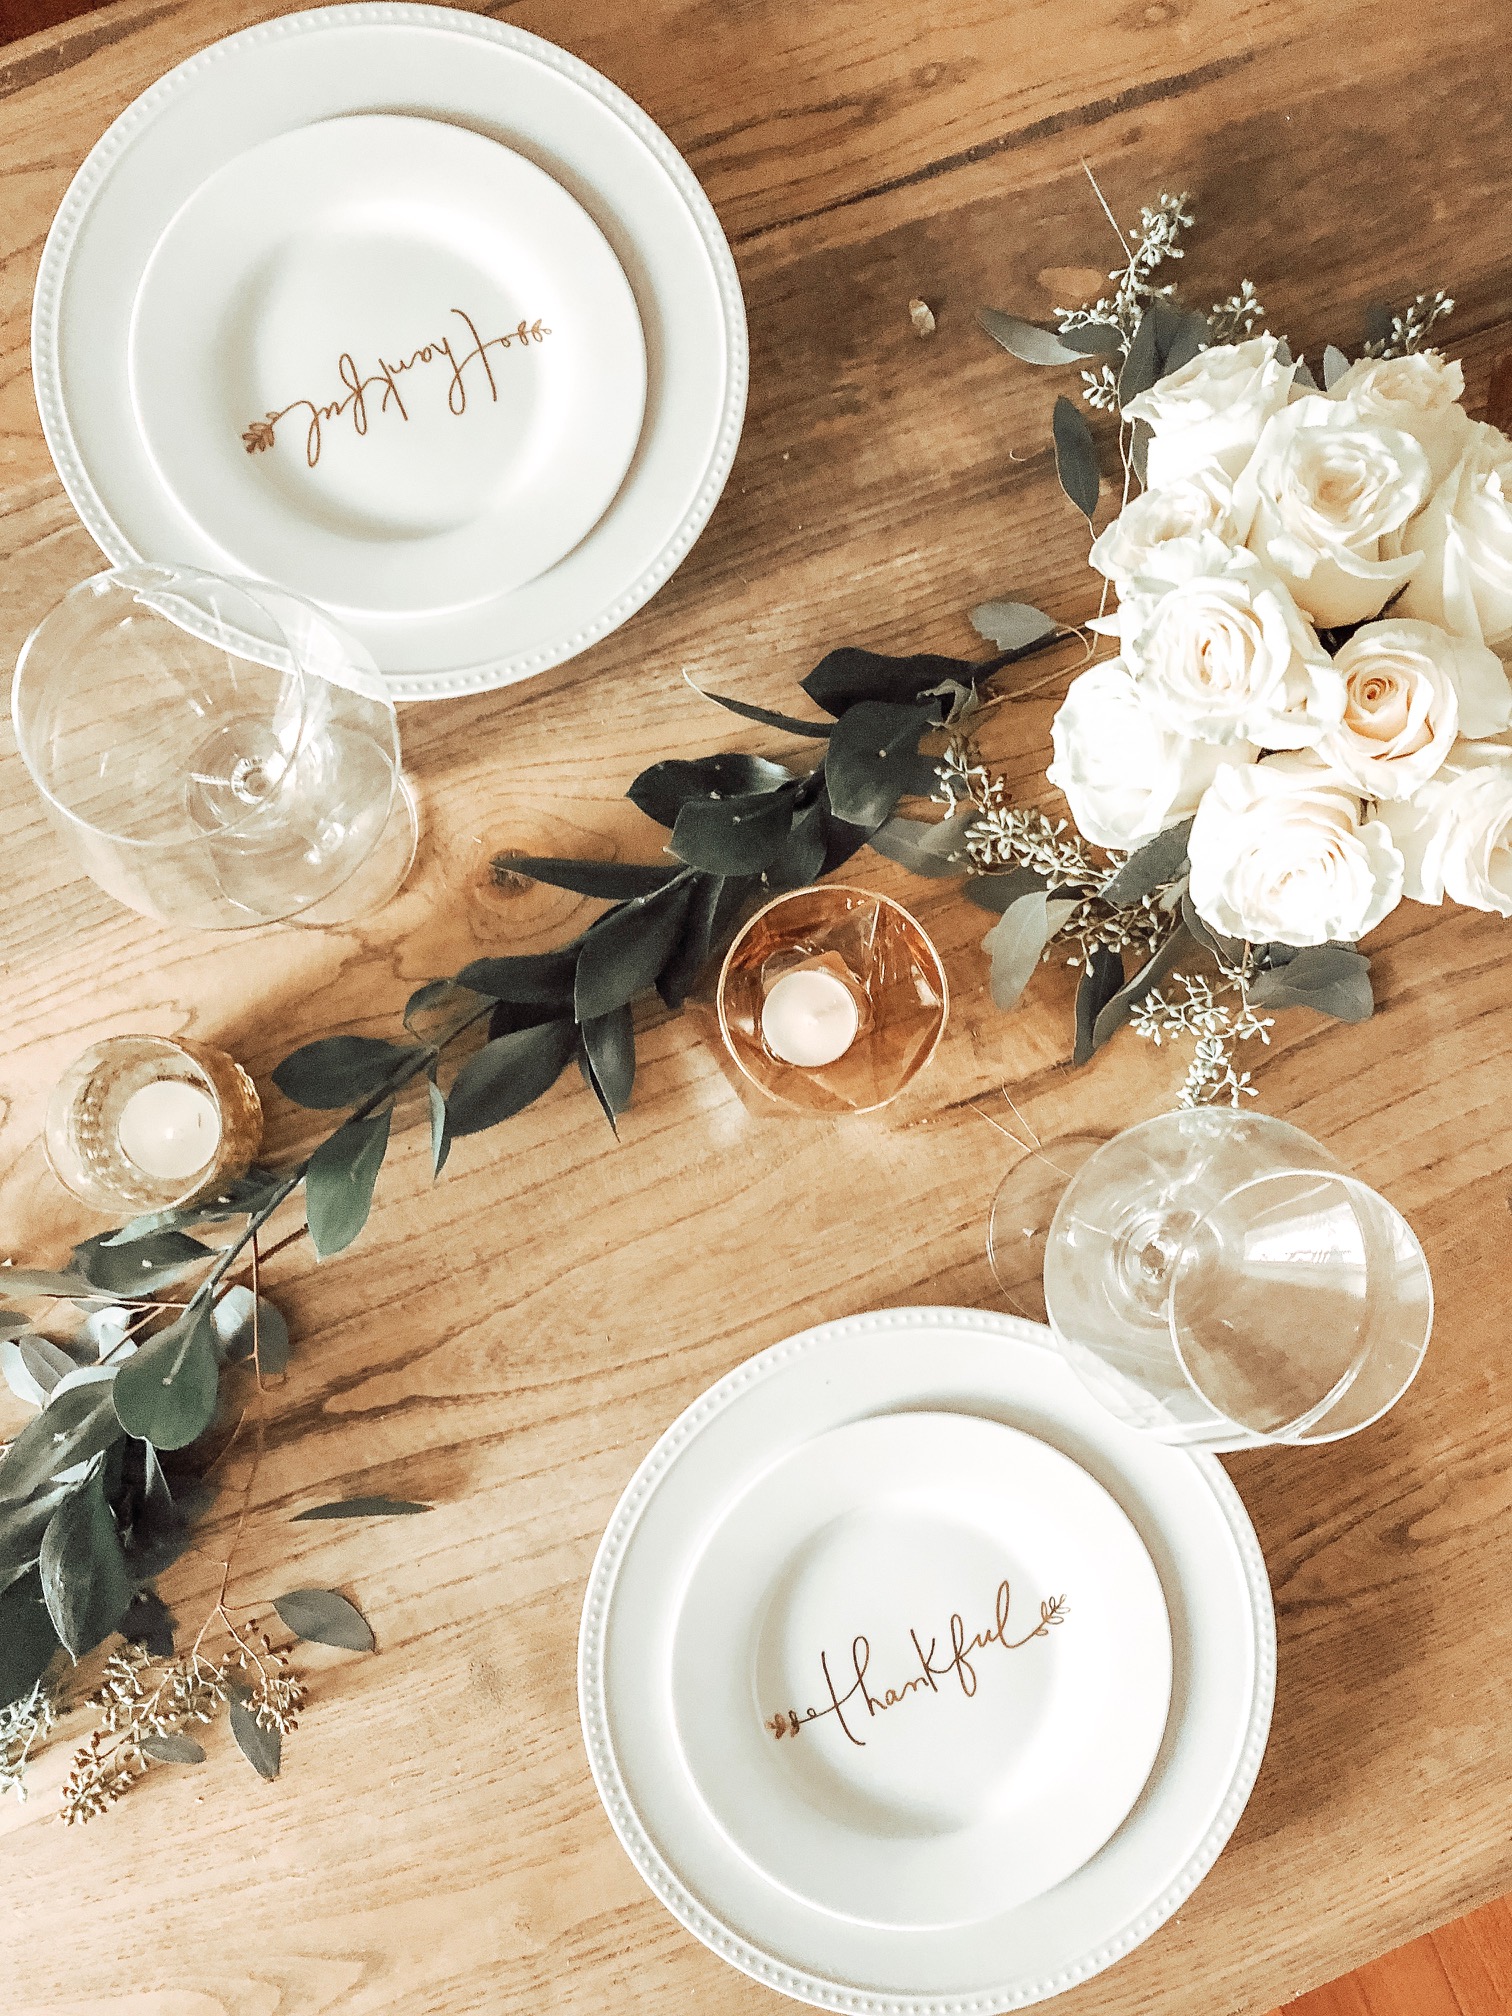
These Thankful plates are perfect for any Thanksgiving table!

These Thankful plates are perfect for any Thanksgiving table!

DIY: THANKSGIVING TABLESCAPE

November 18, 2018

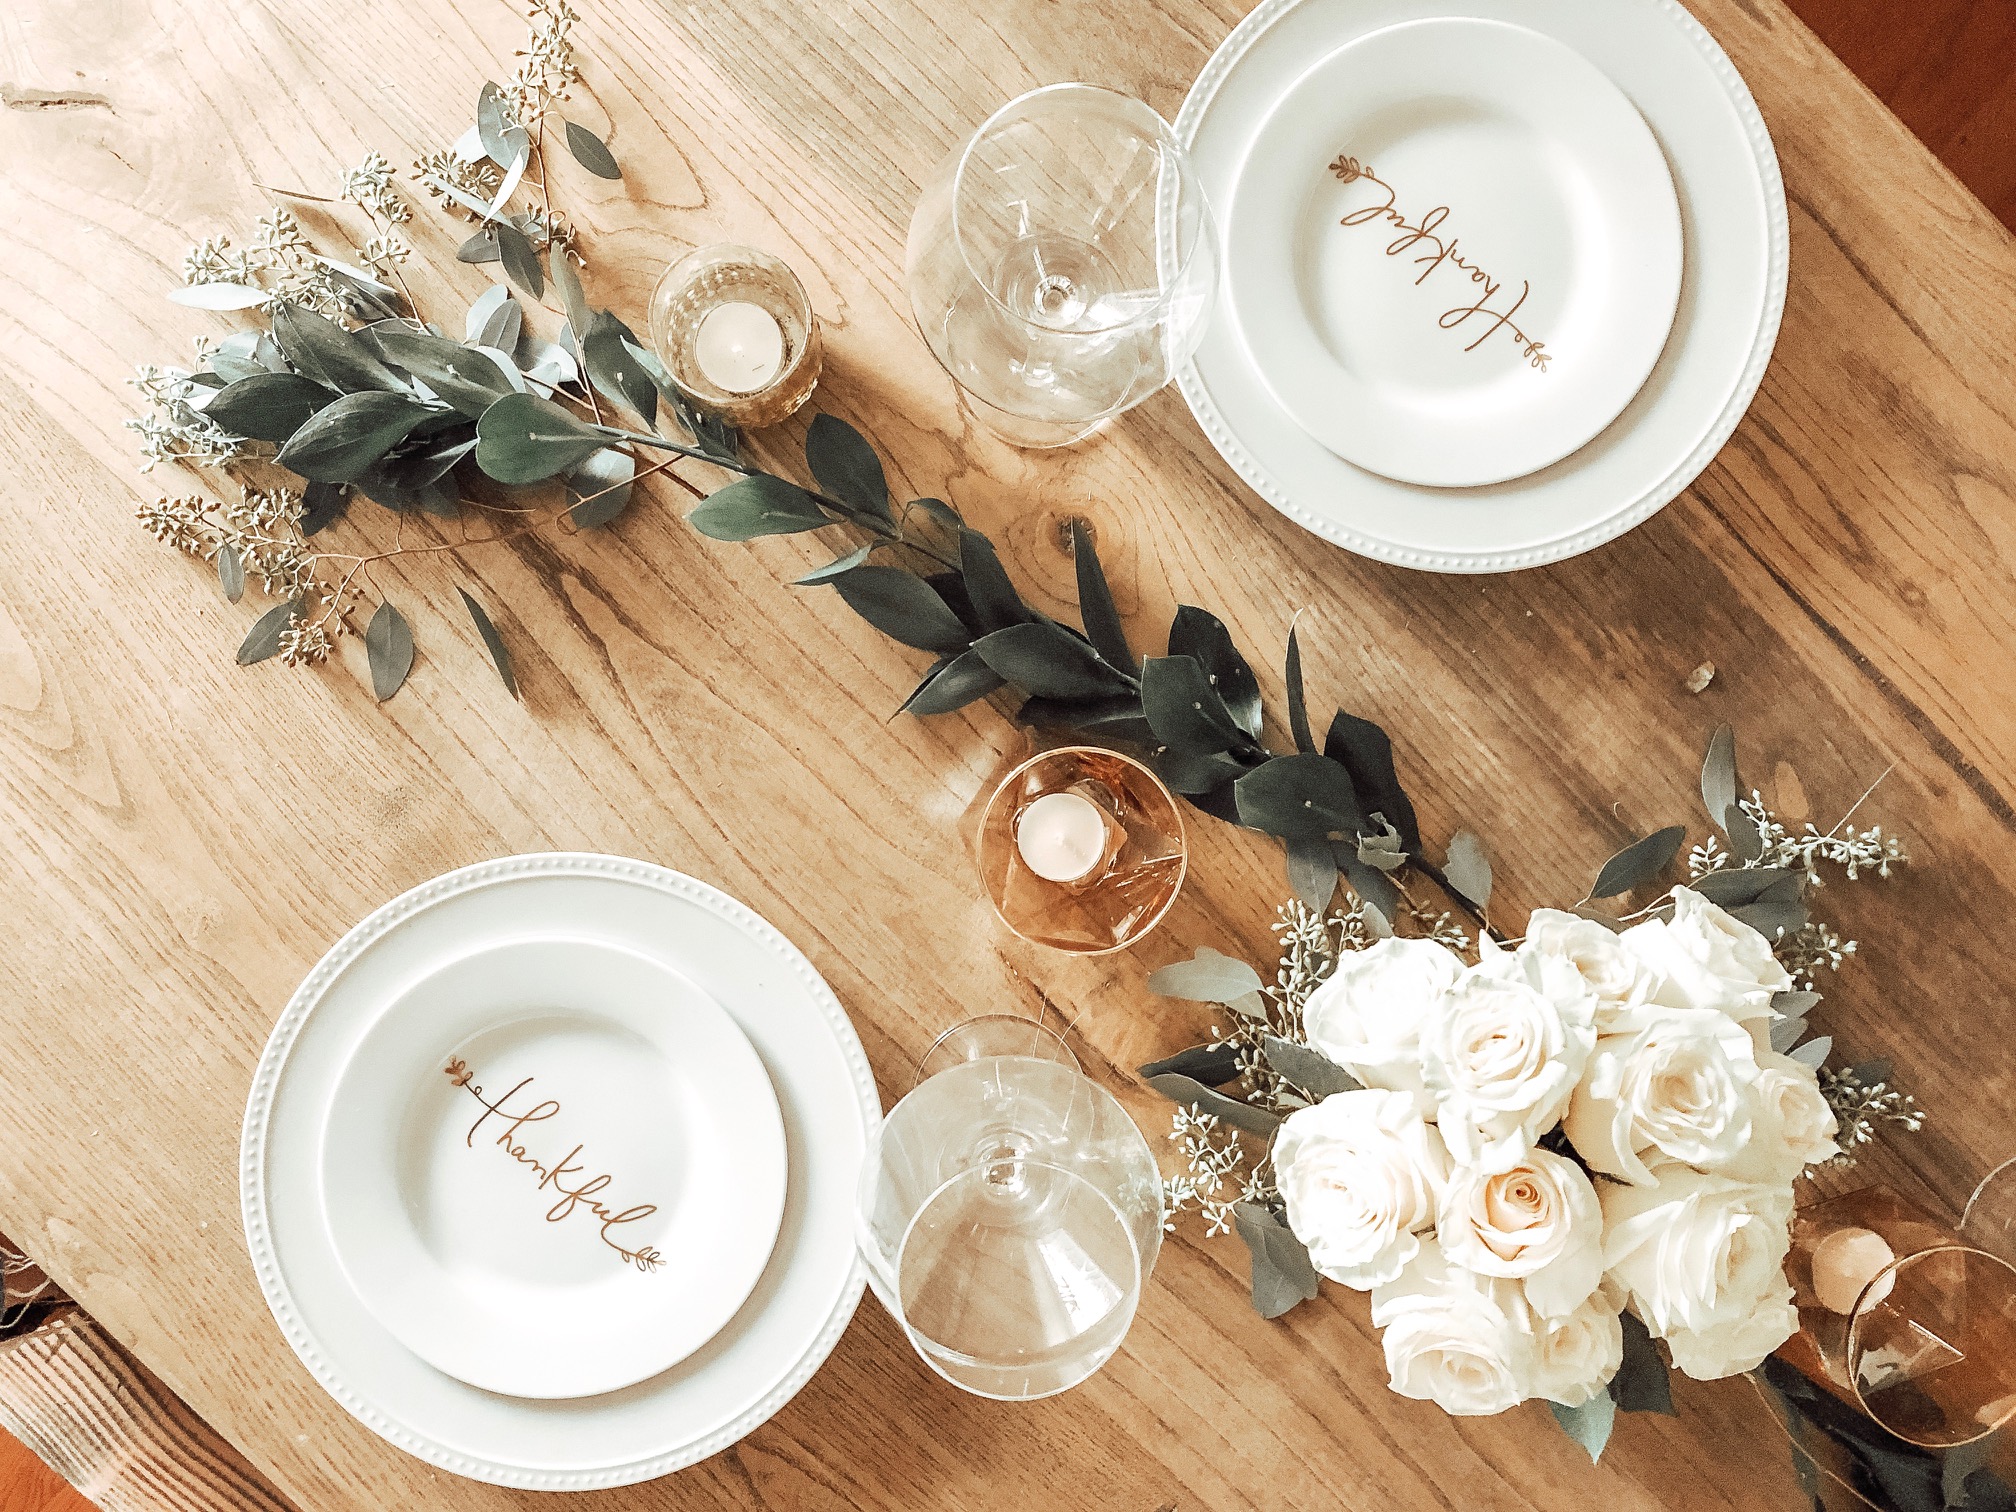
For Friendsgiving or as we call it, “Galsgiving” I wanted a romantic and inviting vibe. With not a lot of money to spend on the decor I made a trip Trader Joe’s and called it a day!

I used greenery from Trader Joe’s and a little floral table to make this garland

I used greenery from Trader Joe’s and a little floral table to make this garland

So of course, I used a little DIY to create this garland! Here’s how:

  1. Grab 2 bunches “Mixed Greens” and “Eucalyptus Leaves” (only 2.99 each!)

  2. Place on the table as desired - Make sure each stems are facing in towards the middle and leaves facing out

  3. Create two pieces of the garland (both facing out from the middle)

  4. Wrap green floral tape around unnoticeable locations, trim stems as you go.

  5. Leave the middle unattached (this is where your flowers will go)

These Eucalyptus leaves add so much dimension, I’m obsessed.

These Eucalyptus leaves add so much dimension, I’m obsessed.

6. Cut Eucalyptus leaves in to smaller bunches

7. Scatter Eucalyptus throughout garland and at the each end

8. Use remaining Eucalyptus to place around center bouquet to hide the end stems of the garland

Is there any time a white rose bouquet doesn’t go?? Love the romantic vibe it adds to this Thanksgiving table scape.

Is there any time a white rose bouquet doesn’t go?? Love the romantic vibe it adds to this Thanksgiving table scape.

9. Create a white rose bouquet by trimming stems and placing in a pretty vase (this one’s from Michael’s). I chose goldish color to tie in with the Thankful plates and candle votives. These plates are from last season but these are pretty close!

10. Place candle votives, set the table, annnddddd…. make yummy cocktail!

Aperol Spritz - the perfect Thanksgiving cocktail!

Aperol Spritz - the perfect Thanksgiving cocktail!

An Aperol Spritz is the perfect cocktail to serve on Thanksgiving! First, (and most importantly) it’s gorgeous! Next, it’s super light and easy to drink (since it’s Prosecco based it won’t get you too drunk to fast haha). Last, You won’t spend your whole night bar tending because it’s super easy to make!

You will need:

  • Aperol

  • Prosecco (This brand is from Trader Joe’s)

  • Trader Joe’s Seltzer Water - Blood Orange flavor

  • Sliced Oranges

Now mix it all up

  • Fill wine glass with ice

  • fill mostly with Prosecco

  • Add a shot and a half of Aperol (only one shot if you don’t want it too sweet)

  • Add a splash of soda water

  • Garnish with an orange slice

  • ENJOY!

Comment
DIY Christmas Doormat

DIY: CRICUT DOOR MAT

November 7, 2018

I’ve been into a phase of making my own doormats for every season! In this post I include a step by step tutorial on how to create your own doormat for Fall and Winter seasons! 4 Cricut templates included!

WARNING CRICUT NEEDED!

Before we can get to the fun part, you will need to create your template in the cricut design space.

Here’s How:

Download desired templates below by clicking on the images and save as PNG:

JOY TO THE WORLD | DIYDONTYA.COM | @ANAEGGER | CRICUT DOOR MAT TEMPLATE

GO TO CRICUT DESIGN SPACE:

DIY Doormat materials

In the cricut design space hit “upload”
Hit “Browse”
Select downloaded png
Select “image type” - “simple”
Hit “Continue”
Hit “Continue again”
Hit “Save a cut image”
Hit “Save”
Hit “Select the image”
Hit “Insert images”
Rotate vertical
(For this project you must have a 12 by 24 cricut mat)
Resize png no bigger than 22 inches tall 11 wide
Click “make it”
Make sure you have 12 by 24 mat selected (I used thin poster board from cvs)
Trim poster board to fit mat
Proceed as usual!
Once template is printed use tool to remove middle pieces.

NOW WE CAN GET STARTED:

FIRST, Gather your materials

You will need: Blank doormat ($20), black acrylic paint ($5), Krylon matte sealer ($9), foam brushes ($5), thin paint brushes

DIY Doormat Materials

Next, use sewing pins to pin template in place as desired. Don’t forget to pin middle pieces! Cut and rearrange as desired.

DIY doormat step 2


THEN, dab paint with foam brush in open areas to form your letters. You are gonna have to dab for a while!
Use thinner brush to fill in nooks and crannies

DIY Doormat Step 3

Once you feel all space has been covered remove template
Do you love it?!
Spray with sealer to keep it lookin’ fresh!

DIY Doormat Step 4

And of course take a cute pic, you did it yourself girl!

FALL PORCH DECOR

FALL PORCH MAKEOVER

October 28, 2018
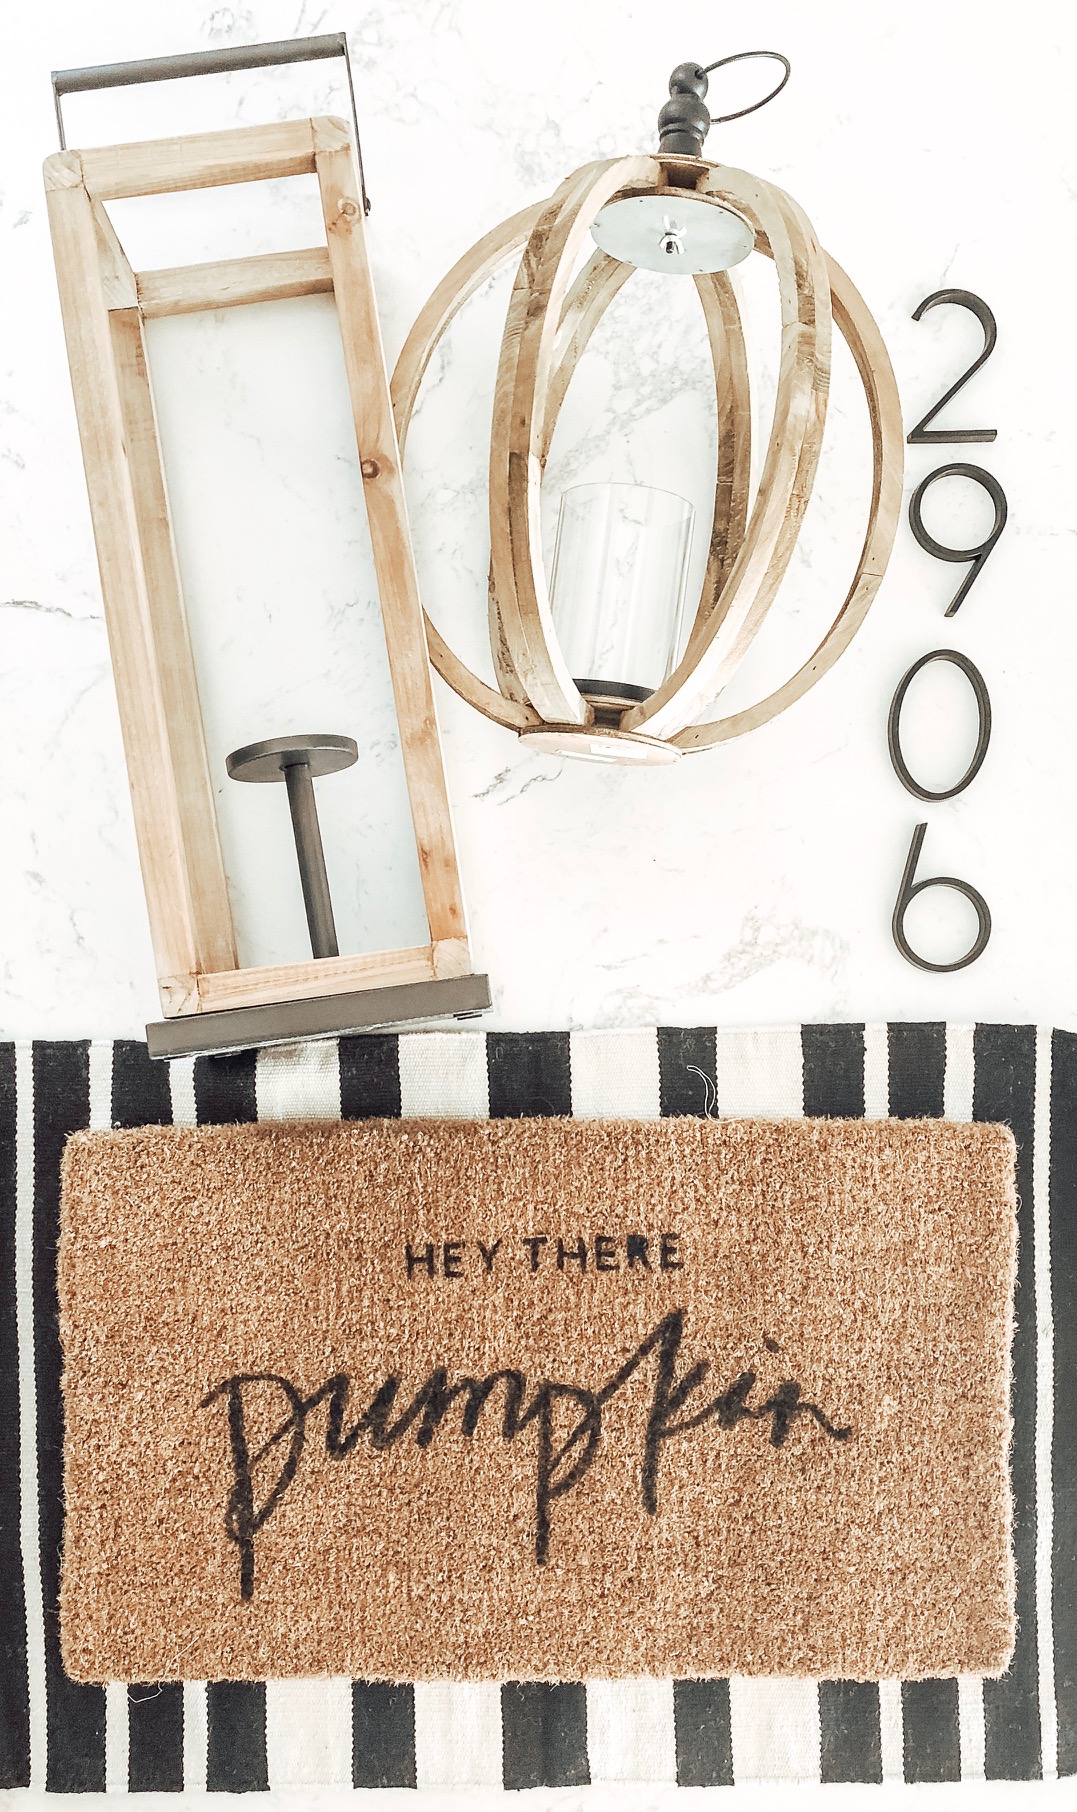
THE FALL PORCH MUST HAVES!

THE FALL PORCH MUST HAVES!

You know you are obsessed with design and decorating when you re-landscape your entire front yard just so you can decorate for fall! (Porch re-landscaping post coming soon!) Here are some time tips to help makeover your porch just in time for fall!

5 FALL PORCH ESSENTIALS:

1) Lanterns, lanterns, lanters: I love lanterns on porches! They add so much and can go with any season! I got my lanterns from Homegoods!

2) Farmhouse Porch Light Fixture: This lamp is neutral and will go with anything! I found it at Walmart for under $40. Amazing!

3) Address Numbers: These black numbers add a touch of modern and work well with the black accents throughout the porch.

4) Layered Doormats: I used a striped 2x3 outdoor rug as the base (find it here). This rug brings out the black accents and adds a nice pop! On top I placed a trendy pumpkin doormat (see tutorial here).

5) Wreath or garland: I made this one too. Check out the tutorial!

Ooohhhhh and pumpkins of course: I grabbed four of the most interesting pumpkins I could from my local Trader Joe’s (only 5.99 each!). I’m obsessed with the bumpy gray looking one!

HAPPY FALL Y’ALL!

1 Comment
DIY: FALL DOOR DECOR

DIY: FALL DOOR DECOR

October 28, 2018

I was on a mission to find the perfect fall wreath to put the finishing touches on my fall porch decor. But, I couldn’t find any that matched the neutral color tones I was going for. I was walking through target when I spotted these beautiful mini pumpkin stems. I was instantly inspired and decided to go with it!

IMG_8537.JPG
IMG_8535.JPG
IMG_8534.JPG

1) You will need your 2 stems and green floral tape

2) Cross stems and offset lengths (this will give your garland a more dynamic look)

3) Wrap floral tape around the cross section of the stems until secure.

4) ENJOY!

Love the look of my DIY fall garland!

Love the look of my DIY fall garland!

Tags FALL DOOR DECOR, DIY FALL GARLAND, DIY FALL PORCH DECOR
Comment
DIY Coastal Farmhouse Dining Bench

DIY COASTAL FARMHOUSE DINING BENCH

October 12, 2018

We couldn’t afford a full dining room set so I we made these instead! Here are the steps! I used the building tutorial from HOME MADE BY CARMONA (then put my own spin on it ;)

1) Sand before assembling! (This will make it much easier to reach all the nooks and crannies).

2) Once legs are built - stain the leg pieces and main bench piece before drilling together. I used Minwax penetrating wood stain in Jacobean. Find it here.

3) Let the stain dry then drill legs to the main piece.

4) Here is the key to the coastal farmhouse look… SAND again! Use an electric sheet sander to sand down the dark stain allowing the grain to come through. Sand until you get it as light as you would like.

IMG_8014.JPG

5) Clean with a wet rag and you are DONE!!!!

These benches complete the perfect coastal farmhouse look.

These benches complete the perfect coastal farmhouse look.

Happy sanding!

Tags DIY coastal farmhouse dinning bench, Farmhouse Dinning Room Decor
Comment
SUMTOFALL.jpg

SUMMER TO FALL DECOR

September 29, 2018

I always try to find ways I can transition rooms quickly, easily, and on a budget! Here are some tips for transitioning your room from summer to fall or any season to the next!

  1. Start with a good base: If you have good staples, any room will transition well. In the dining room I have my hanging pendant light, dinning room table, table tray, black mirror, large glass vases, and black frame.

  2. Keep things BIG and SIMPLE: Neutral colors allow for an easy transition from any season to the next.

  3. Accent florals or greenery: You can find florals or greenery to compliment any season while staying classy and minimal. For summer decor I used the palm leaves from Michael’s (ended up being 2 bucks each!). For the fall decor I use wheat strands from Home Goods (10 bucks for a huge Bundle!)

  4. Use trays: The wood tray on the dinning room table allows me to place accents inside without having to create a whole new center piece. In the summer I used a candle and and wine bottle as accents. For fall I places 3 pumpkins ($2.50 at your local grocery store).

  5. CANDLES: Scent adds more than you think! An apple pumpkin or leaves candles from Bath and Body works can transition any space!

DIY: SUBWAY BACKSPLASH

DIY: SUBWAY TILE BACKSPLASH

July 18, 2018

I started to learn by watching my fav step by step video – MUST WATCH HERE.


First make a trip to your Local HOME DEPOT. Here are the supplies you will need:


DIY: Subway Tile Backsplash Supplies

PICTURED

-OMNI Grip Tile Adhesive (The amount you will need depends on the size of your project, but this giant one will last you forever)

- Fusion Pro Grout ( I used snow white) You can use any color you want depending on the look you are going for

- HDX Trowel 

- Sponge

- Tile Spacers (I used 1/8)

- Scraper tool for excess adhesive

- Sharpie to mark tile 

NOT PICTURED: 

- Sanding stone to sand tiles 

- Rubber grout float 

- Don't forget about the actual subway tile! You can buy these by the case for super cheap. Click HERE.


THE BASIX 

DON’T FORGET THE PREP:

- Remove all wall plugs and faces/turn breaker off 

-Laser level it! Make sure your counter is level (Never is) 

-If it is your good to go. If its not… trim all subway tile so that the tops of the first row are level with your laser (get a guys help with this)

DOIN THE DAMN THING

-Start on one side, 

-Bottom row = 1st tile is a full subway tile & 2nd Row = is half a tile (Makes the offset look uper easy!)

-Scoop adhesive onto trowel. 

-Make it smooth and thin. Keep your traul at a 45 degree angle. 

-Use the laser level to guide your tiles… 

-place a couple tiles at a time then add in spacers (push up) 

-Let dry for however long package says  

-Lay grout over, and wipe off excess with sponge 

-Let dry for however long package says 

-Clean

-Enjoy! 

DIY: SUBWAY TILE BACKSPLASH
IMG_6839.JPG
IMG_6891.JPG
In DIY HOME IMPROVEMENT Tags how to do subway tile yourself, diy subway tile tutorial, doy subway tile, easy subway tile backsplash, subway tile backsplash tutoria, Subway tile backsplash ideas, easy subway tile tutorial, farmhouse subway tile, cheap subway tile ideas
Comment
KITCHEN OPEN SHELVING STYLE TIPS

STYLE: KITCHEN OPEN SHELVING TIPS

July 18, 2018

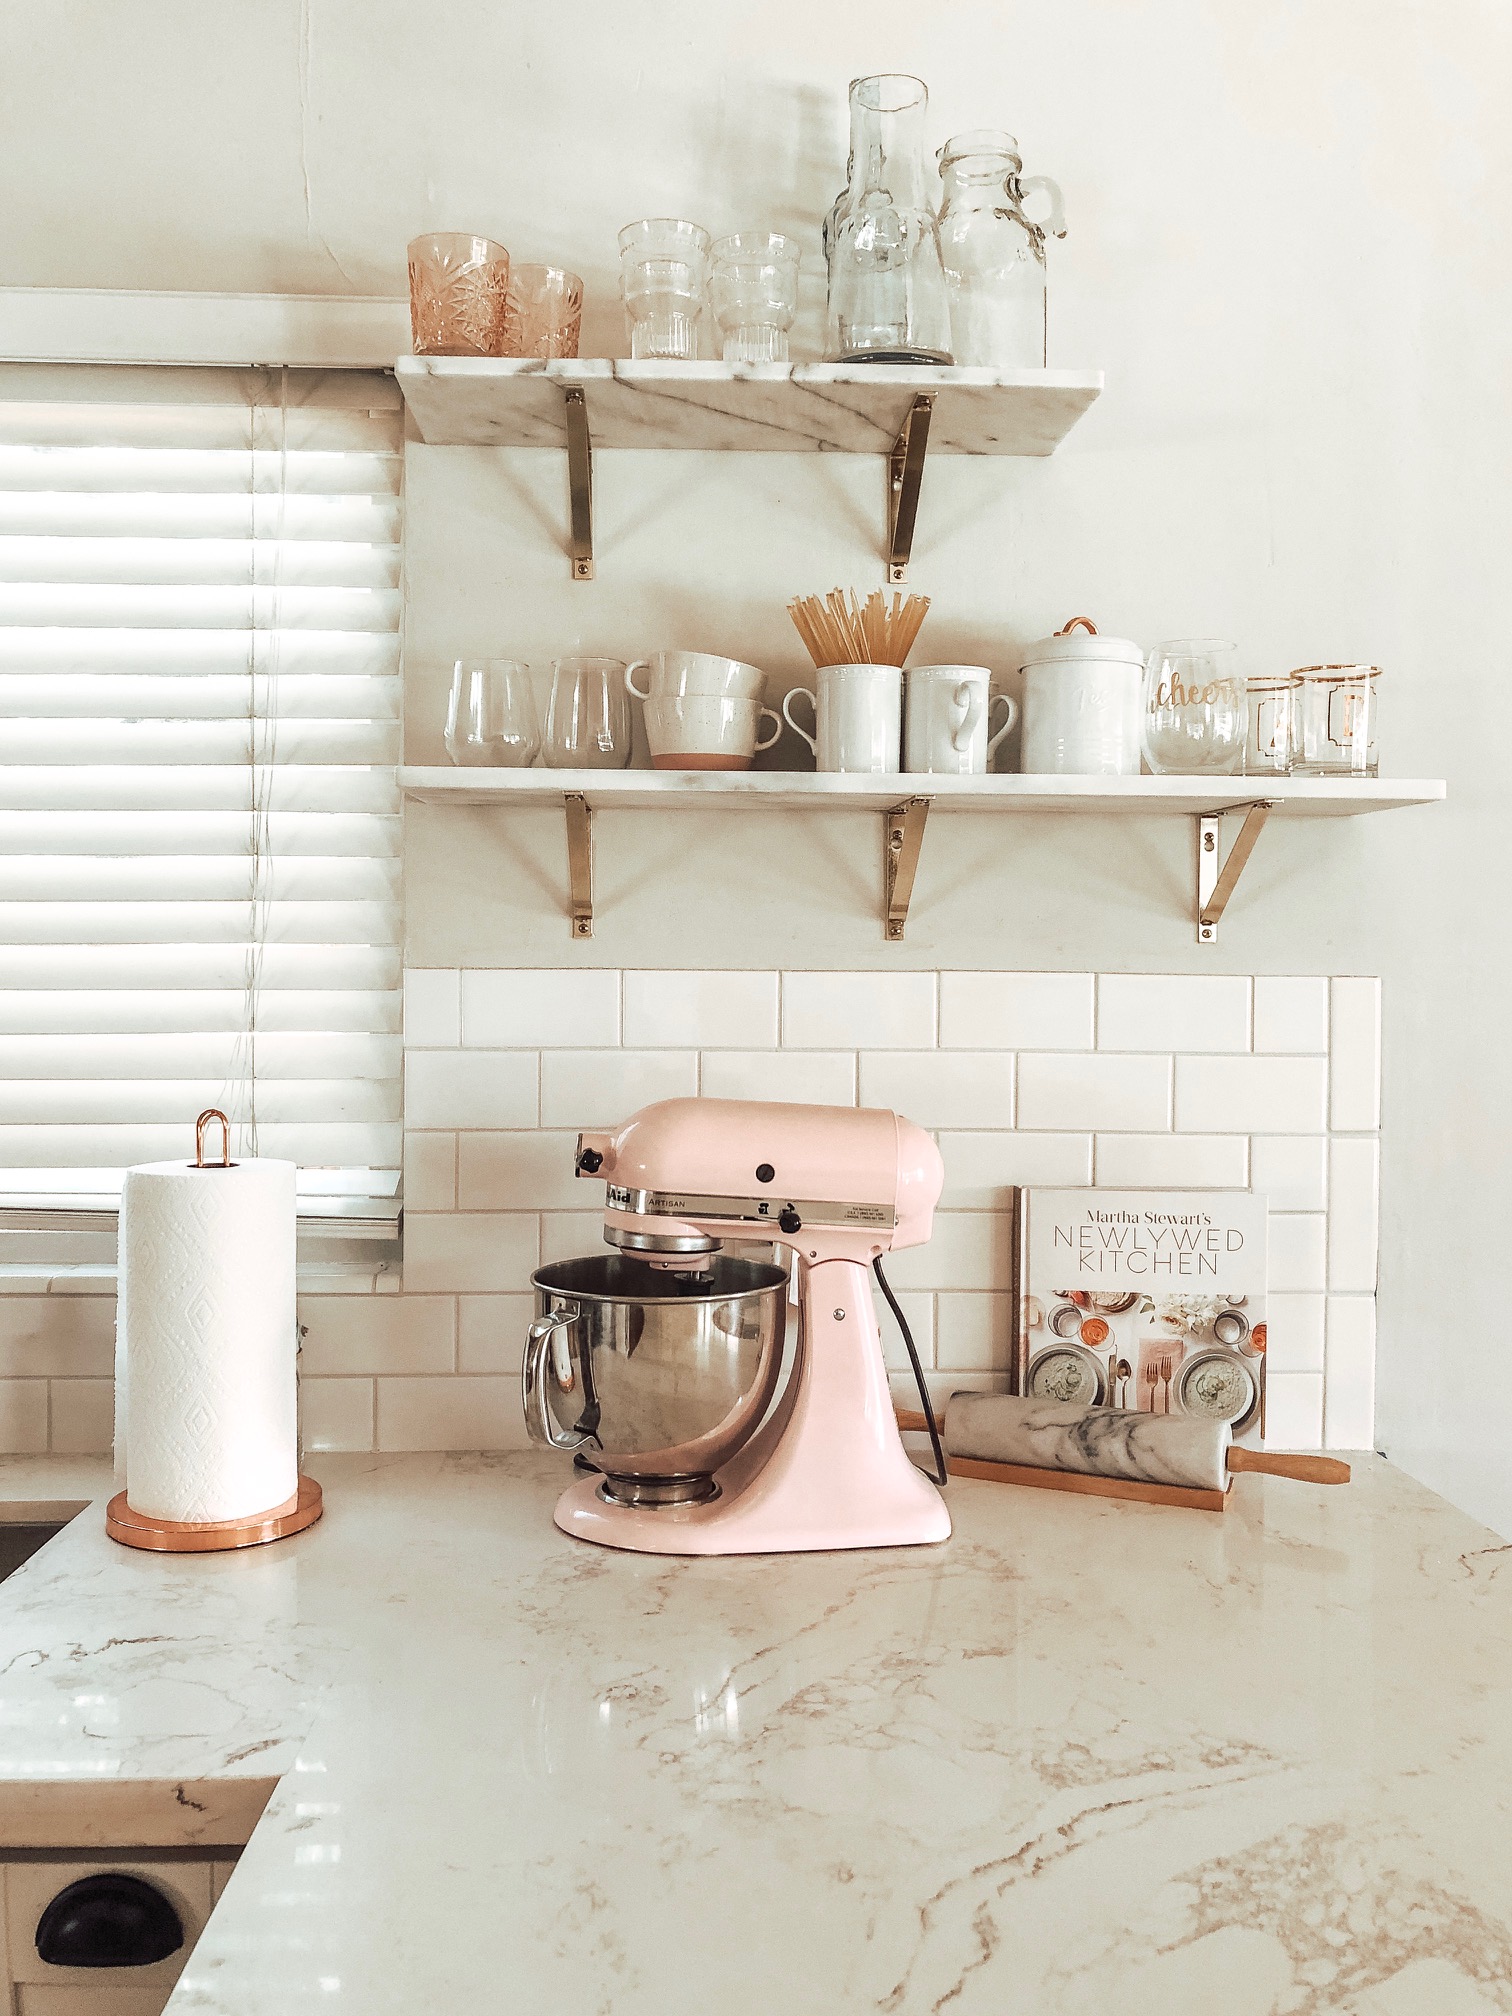
I have open shelving in my kitchen, which can be a challenge when it comes to keeping a neat, trendy, yet functional presentation. If you are like me and couldn’t resist the trend - Here are some tips!

WOOD SHELVING STYLE

We built and stained wood shelves ourself - See shelving tutorial HERE. 

LOWER SHELF: Necessary items used most frequently - cups, bowls, plates, measuring cups, coffee press, olive oil, shot glasses (I mean they are necessary right?).

TOP SHELF: Style pieces used less frequently - Pasta jars, ice bucket, stylish cups, cocktail mixer

MAKE SURE IT ALL GOES: Make sure cups plates and bowls match. This can be accomplished by buying a 16 piece dinner set. 

CHOOSE A HUE/COLOR: Choose and accent hue for additional pieces that aren’t glass. (I chose copper/rose gold)

KITCHEN OPEN SHELVING STYLE TIPS

MARBLE SHELVING STYLE

LOWER SHELF: Necessary items used more frequently - glasses, coffee cups, fun bowls, cocktail cups. 

TOP SHELF: style pieces used less frequently: Water Carafe, fun cups, etc. 

CHOOSE A HUE/COLOR: Choose and accent hue for additional pieces that aren’t glass. (I chose light pink because I LOVE IT and it ties in with the copper and rose gold) 

Tags Open shelving, kitchen open shelving style, open shelving tips, wood kitchen open shelving, marble kitchen open shelving, open shelving ideas, farmhouse open shelving, kitchen ideas, open shelving decor, How to style open shelving for the kitchen, rose gold home decor, rose gold kitchen accessories
Comment
CHEAP TRICK: CHANDELIER + CRAFT PAINT

STYLE: CHANDELIER + CRAFT PAINT

July 17, 2018

Your favorite onilne site is having a major sale but the item you want is not available in the exact color/finish you want. No problem! Spray paint/craft paint is your best friend! I got this hanging chandelier from Wayfair.com.  During and amazing sale.

It came in a weird silver matte color that just didn’t go with my aesthetic. So instead of passing up the sale I made it the exact color I wanted myself. 

CHANDELIER + CRAFT PAINT

This time I desided to go with deco art craft paint. I got it from Michael’s in the shade antique metallic gold. I used a sponge brush and after a couple coats it turned out exaclt how I wanted it!  Yay. Another cheap trick for ya!

CHANDELIER + CRAFT PAINT


Notes: Sign from smallwoodhome

In DIY PROJECTS Tags How to paint metal chandelier, DIY metal chandelier, how to change chandelier color, gold chandelier tutorial, DIY decor, DIY chandelier, farmhouse entry way, farmhouse chandelier
1 Comment
← Newer Posts Older Posts →

Latest Posts

Featured
Touches of BLUE
BARELA KITCHEN REMODEL DETAILS
Manhattan Dining Room Project
ENTRY WAY REVAMP
DIY Light Sconce without Wiring!
Manhattan Guest Bathroom Remodel Details
Christmas Jar DIY
Baby Nova's Nursery Details
DIY Bathroom Shelving
Boho Entryway Inspo